

reflections
on photography and life

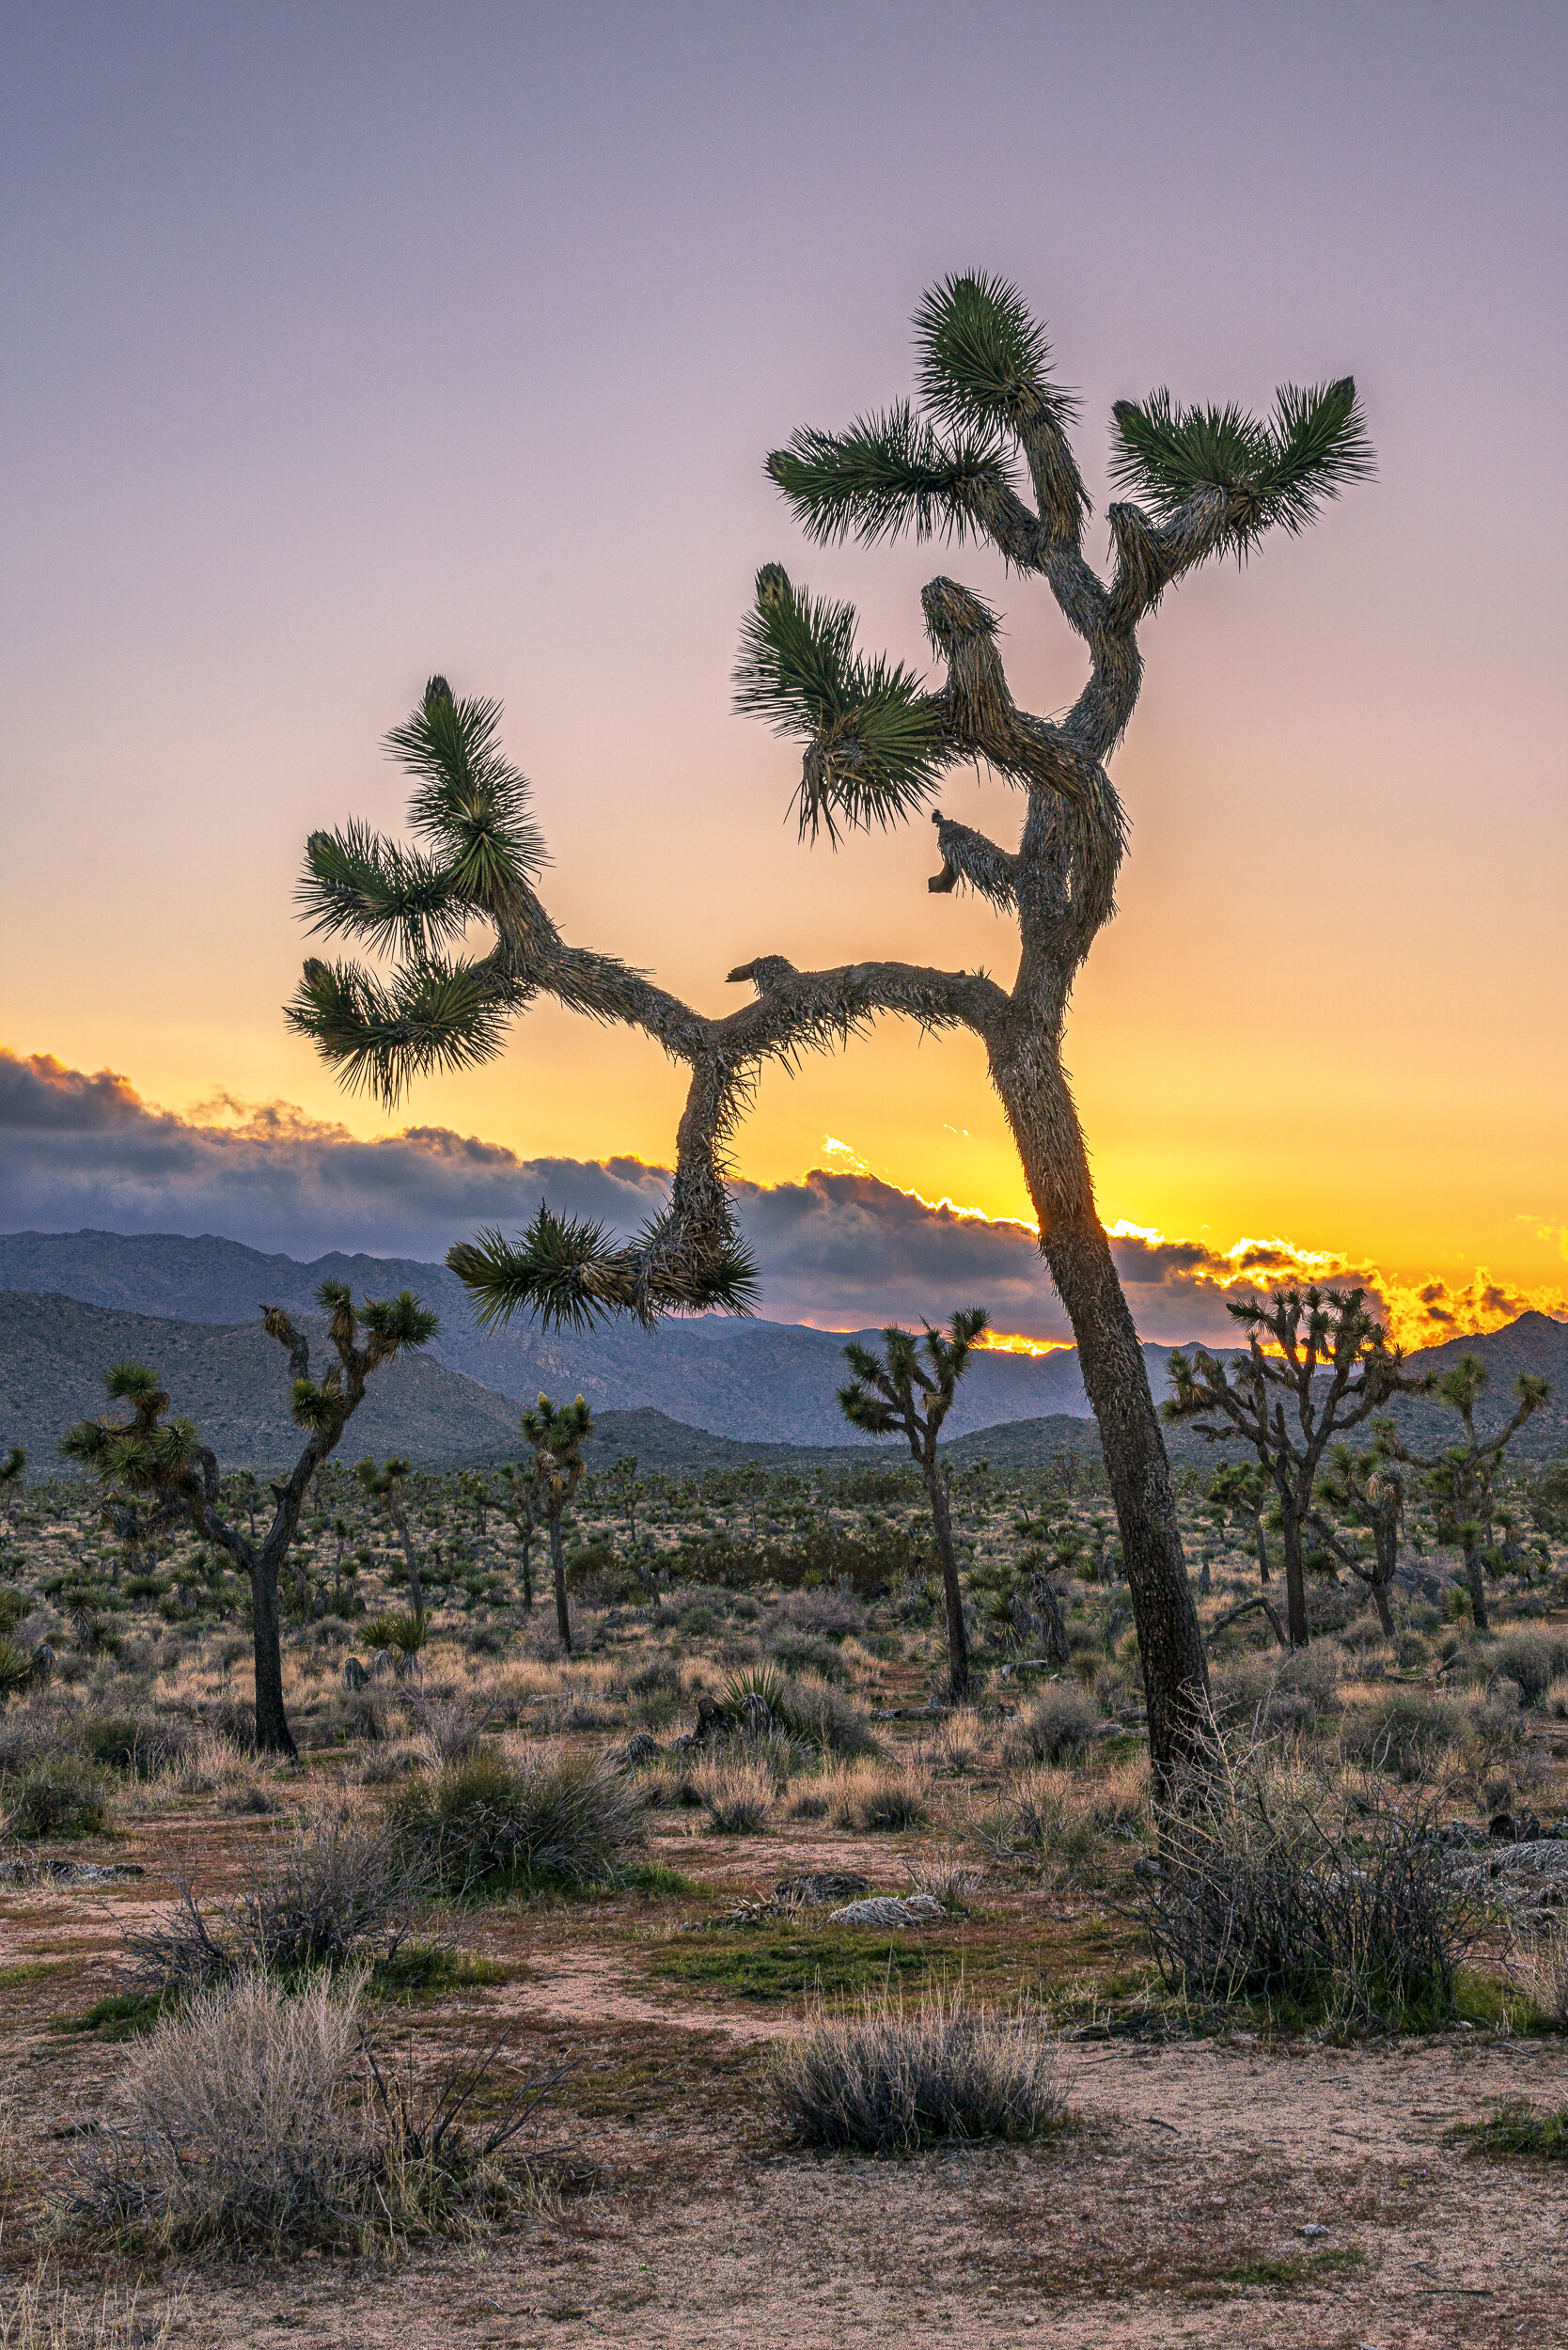
Joshua Tree

Orion hangs in the night sky over Joshua Tree National Park. Sony A7RIII with Zeiss Batis 18mm and Lume Cube. 15 second exposure, ISO1600 at F2.8
The name had been in my life at least since the U2 album of that name appeared in 1987, with a lone Joshua Tree featured on the album graphics. (Not actually photographed in Joshua Tree National Park, but in the Mojave desert.) Perhaps before that, because copies of the National Geographic Magazine came into our home every month as I was growing up and I used to pour over the photographs, dreaming one day of being able to visit some of these magnificent locations.
My childhood dreams finally began to be realised this year when we found ourselves staying only an hour’s drive from the entrance to the National Park. I had been hoping to book a photographic workshop in the park at night with a well known professional photographer to capture the night sky with the iconic trees in the foreground but unfortunately the weather turned inclement - it actually rained - the workshop was cancelled and the photographer concerned went to Arizone instead!
However, thanks to my son-in-law’s willingness to accompany me and to a change for better in the weather, the first clear night found me hunting for compositions in the dark! This is not what I would recommend, but it was all I could do. Fortunately there were other photographers around so that helped alert me to where some of the better locations might be.
I was amazed at how cold it was in the desert - 7 degrees centigrade. I had brought a jacket just in case, which helped a little but I was not well prepared! (Next time!)
Our time was very limited - around 50 minutes in the park itself - so there was no question of driving into the more remote areas where there is less light pollution from the surrounding towns. Fortunately we didn’t have to go far before spotting a perfect subject conveniently growing at the side of the road, with Orion shining above it. Initially I shot a couple of silhouettes but then I decided to use the light from a Lume Cube I had brought with me, diffused through a paper handkerchief! That provided just enough illumination to make the Joshua Tree stand out from its background. (It took several attempts before I got the balance where I wanted it.)
There was a final opportunity to pay another brief visit to the park on our way back to LA. We managed to time this for sunset. Once again it was a bit of a scramble to find compositions but I was very happy with the results, given the time constraints.

This first view of the park gives an idea of the rough desert terrain and the chaotic nature of this challenging landscape. Unlike anything I had ever experienced.
A low sun was still shining as I got out of our van and tried to make some order out of the rather chaotic landscape, while avoiding the many tourists who were there - and the barbs of the cacti!

Shooting with the sun provided the best lighting. There was no time to use a tripod. All sunset photos were taken with the Sony 24-105 lens which is exceptionally versatile.

In addition to the trees one of the main attractions of the park are the amazing rock formations. I would have loved to have explored these more.
Joshua Trees are not really trees! They are a type of yucca, a perennial shrub that only grows in the American South West. It grows to a height between 5 and 16 metres tall, and takes on a variety of shapes. Some are quite thick, others are rather spindly in form. And they are as prickly as they look! Many of them were in bloom when we were there in February, which was a nice bonus. While the specifics vary, the name ‘Joshua’ appears to have been given to the tree by early Mormons who saw the branches of the tree as arms outstretched in supplication, like the biblical Joshua.

I just managed to capture the setting sun before it disappeared behind a bank of cloud. I would have preferred to have stood a couple of metres to the right but the spot was already occupied!
When the sun went down the other photographers immediately packed their gear away. I stayed and was rewarded with some beautiful light.

The setting sun was still lighting up the clouds as once more I shot with the light.


Meanwhile my grandchildren were having great fun in this startling landscape. I was able to get them to sit still for a few seconds to grab a shot I will long cherish. If you get the impression that they were cold, you are right!

I found Joshua Tree National Park to be a wild, rough, bleak yet beautiful place. I would love to return to experience it all over again and to explore deeper into its vast territory. As a first visit to a National Park in the USA it could hardly have been more inspiring. I’ll leave the last word to the iconic ‘tree’ that gives it its name.

If you go down to the woods today...
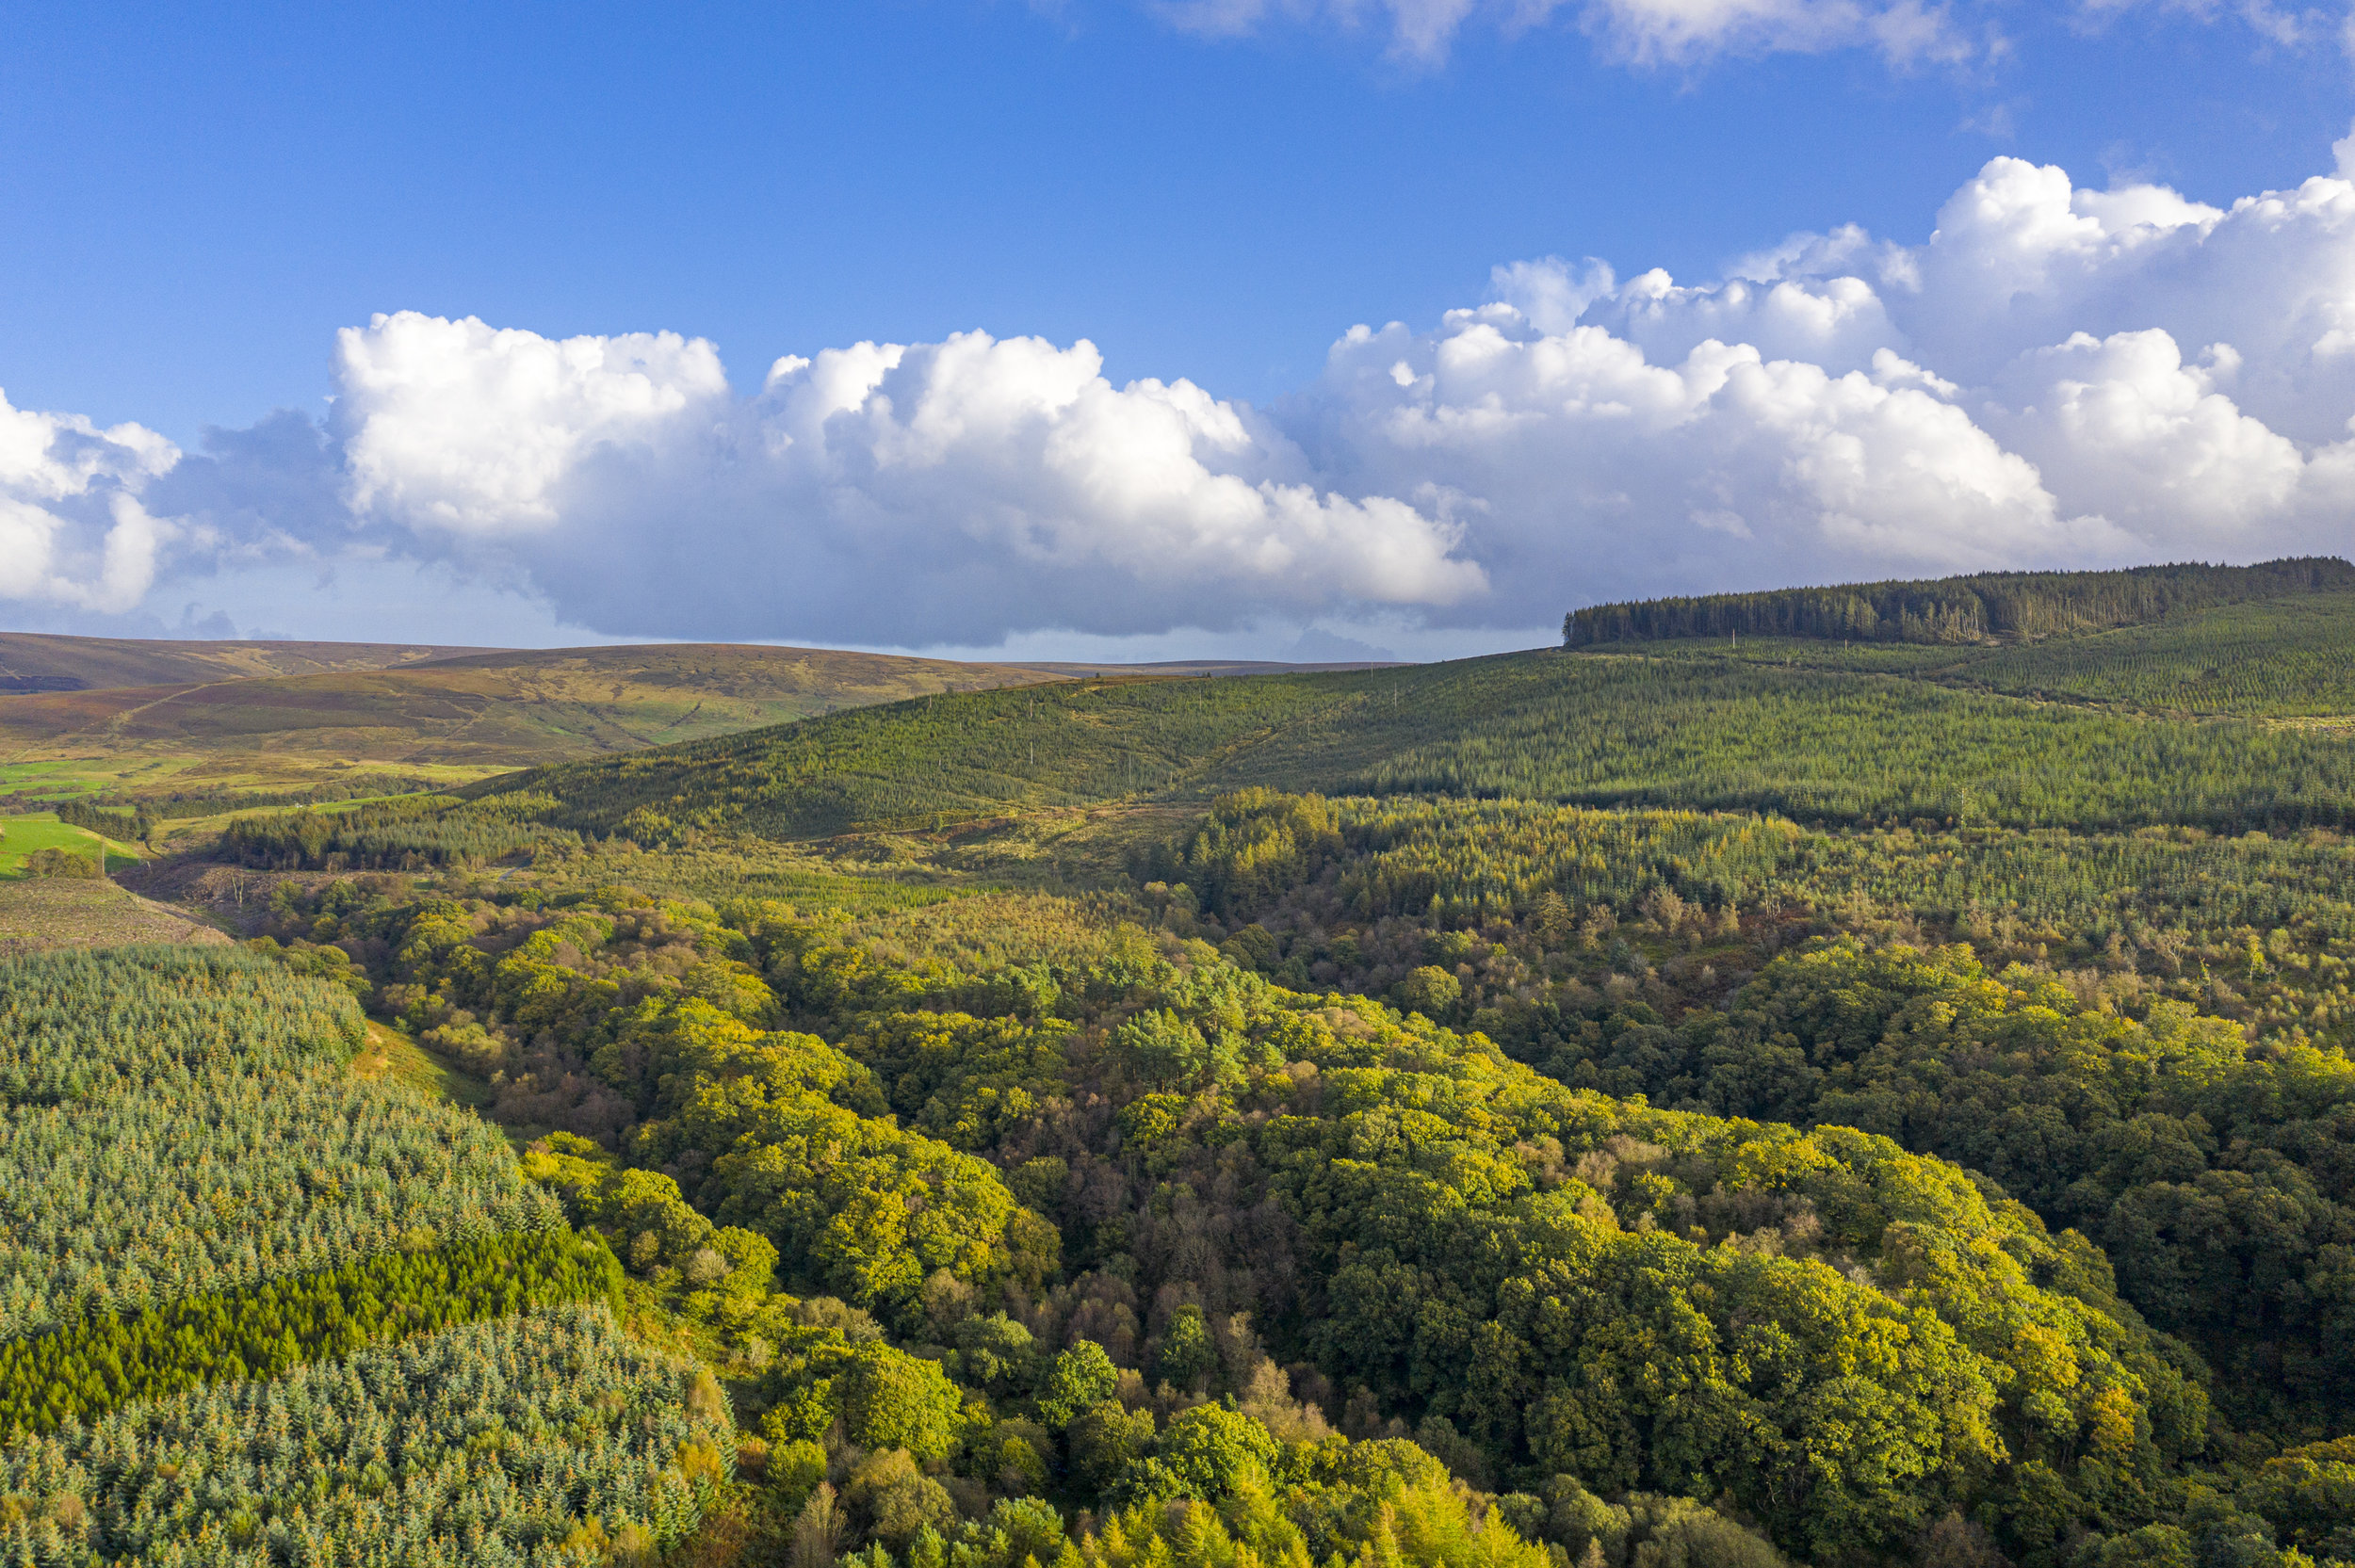
Drone photo of the Breen Oak Wood, Glenshesk, Co Antrim
Today, in early October, I had the joy of exploring a location I had never visited before and which is less than 10 miles from my home in Co Antrim. The Breen Oak Wood.
Going down to the woods is not as easy as it once was. This island used to be covered in oak wood, but only small pockets remain. What trees there are in this most deforested part of Europe consist mostly of ugly commercial plantations of spruce and pine trees, in uniform rows, tightly packed together so that wildlife can scarcely breathe let alone live and which, when cut down, leave behind an apocalyptic landscape. (You can tell I’m a fan!) So it was such a joy to find this gem of a wood so close to home.
At the entrance to the wood lay a pond, overhung by a variety of trees, reeds and grasses. Parts of it caught the mid-afternoon sun and while it was still mostly green, there was a hint of autumn colour.

The Breen Oak Wood pond showing some autumn colour in the October sunshine
The wood lay beyond, dense and mysterious, with various walking trails snaking through the undergrowth of bracken, bluebell leaves and wild blackberries, inviting me in. Trees are old friends. In my childhood home I was surrounded by trees, wonderful lime trees, lofty scotch pine, an iconic monkey puzzle tree, chestnut and the crowning glory, a huge copper beech, in which there was a make-shift tree house, stage for many tales of galant knights rescuing damsels in distress. Stage too for water fights! Trees filled many of the poems and the books I read, especially Narnia with its talking trees. Breen Wood was just such a place where trees whispered to each other. And, turning suddenly at a cracking twig, I wouldn’t have been surprised to see Treebeard himself.
Woods are not neat. There is no order here and in the glorious chaos it was difficult to isolate a single tree, let alone make some kind of compositional sense of the scene before me. A little fog or a good snowfall would make an enormous difference (mental note taken!). But the tree scented autumn air and the creative challenge were good for me and a healthy distraction on a day when other news was not so good.
After much scrambling, adjusting, checking angles, readjusting, here are some of the compositions I came up with on this first visit. I had decided to travel light: just one lens, the Sony 24-105, my tripod and a polarising filter to cut the light reflected from the foliage and deepen the colours.

A rare opportunity to capture a single tree (or at least part of one.)

The twisted shape of this oak looked to me like some exotic wild animal, surveying the woods beyond, ready to pounce on any unsuspecting intruder.

This is my favourite photograph from the day. I like the impact of the golden bracken in the foreground and connection between the two oak trees, like an old and happy couple, arm in arm, holding on to each other whatever the weather throws at them.

This photograph really does illustrate the chaos of the forest. The criss-crossing moss-covered limbs provided a clear structure on which to anchor the composition, but even it is broken by the twisted and dead branch.
I hope to return soon to see if I can improve on my compositions. But in the end, as so often happens, the photography was secondary to the experience of being immersed in this small patch of woodland. To be continued…

A Child In The Landscape
It has been months since I updated this blog. Summer has been and gone and with it my best intentions to keep up a regular supply of new photography!
“I have an excuse, though. I am a grandfather. What a privilege! ”
This surprisingly beautiful Irish summer will long be remembered in our family for the explosion of energy and joy, the flurry of arms and legs, the bouncing curls and dancing eyes of sweet Eliza.
Grandaughter In Frame
I tend to capture landscapes that are people free. Unless the inclusion of a human figure helps to provide a sense of scale or has a particular connection to the landscape I wait until I have the scene to myself.
But I've discovered that a grandchild brings something very special and universal to landscape photography: particular emotions, an evocation of memories, the viewpoint of a child, a sense of innocence and wonder that we so quickly lose.
First, there was the fun of announcing her arrival. All it took was a simple image of one of the symbols of childhood in these parts: a bucket on a beach.

(In case you are wondering why the seawater is so brown, it often is along our shores where rivers flow into the sea, carrying water from the peat bogs high in the glens.)
The next step was to wait until my granddaughter posed obligingly beside the bucket.

Anyone looking at this in Florida will wonder how a little girl on a beach on a sunny day would need to be dressed like this.
“Granny’s winter knitting was very necessary!”
Remember - this is Ireland, almost at its northernmost point.
The photo gave me an idea.
The Power Of Symbols
For me, this is my granddaughter. But because we cannot see her face, for everyone who doesn't know she becomes a little girl, representative of every little girl.
A symbol of childhood. And rather than looking at her, we are looking with her, seeing what she is seeing, especially as I was shooting from her eye level, not mine.
And that perhaps takes us on our own little journey. The first time we saw the sea; the first time we took our children to the sea. When all of life is about that single moment: a moment of wonder.
From then on, while I took many photos of her from a variety of angles, I sought on most occasions to get down to her level (not always easy when you are 60!) and capture what she was seeing.

Amongst the many scenes captured during this best of summers, this is my favourite. I call it - you guessed it - "Innocence and Wonder".
Shooting The Moon
My favourite poem as a child in primary school was Silver, by Walter de la Mare. It’s a poem about the moon: “Slowly, silently, now the moon walks the night in her silver shoon.” According to Brenda Tharp in her excellent book extraordinary Everyday Photography, the best time to shoot the rising moon is the night before a full moon and not on the day of the full moon itself. The reason is that on the day before there is a period of about twenty minutes when the balance of light is such that it is possible to capture detail both in the moon and in the landscape.
I discovered the truth of this by happy accident one week three years ago when I went to my favourite north coast location - Ballintoy - to photograph sunset.
It was a gorgeous evening. When I thought photography was over for the day, I packed up, and was driving back up the twisty road from the harbour when my peripheral vision caught sight of something that brought me screeching (almost) to a halt.
It was an amazing reddish orange moon. I quickly unpacked, set up my tripod and grabbed a few shots before the moon rose too far and the twilight disappeared.
When I showed the shots back home a question immediately arose: is that really the colour of the moon? How could I prove that I hadn't been messing around with Photoshop to produce impossible colours? Science came to the rescue.
When we look at the moon we are seeing it through the earth's atmosphere. When it is low over the horizon the angle of view means we are seeing its light go through the most atmosphere which in turn means that while the light at the blue end of the spectrum is scattered the light at the red end is not.
So the closer the moon is to the horizon the redder it seems to us.
As it rises in the sky there is less atmosphere for the light to travel through so red turns to yellow and then towards white. A similar thing happens to the sun.
Capturing the moon like this generally requires a combination of good planning and good weather. Planning is possible thanks to a variety of apps that will indicate the times of moonrise and moonset and what kind of moon it will be.
In addition, an app like The Photographer's Ephemeris will indicate the angle of the moon (and the sun) at whatever point we choose.
This helps avoid turning up at a location hoping to photograph moonrise only to discover that it is hidden behind a headland or group of hills. It also helps in trying to select a location where there is an interesting foreground to add interest.
I was again fortunate to be at a point on the coast where I was able to include some landmarks although had I been prepared I would have tried to choose an even more interesting location, such as an old ruin.
Another advantage of shooting the moon close to the horizon is that it will appear larger. This is simply an optical illusion known as 'moon illusion' and the reason for it is still debated.
Getting the right settings in camera for this kind of shot was also a challenge.
As often it is a trade-off between trying to keep the ISO reasonable to avoid noise, having an aperture that allows for acceptable sharpness for the foreground while maintaining the moon in focus and a shutter speed that minimises blur.
For the above shot, I chose 50 at f16 which meant a shutter speed of 3 seconds. If I was doing it again I would try for a faster shutter speed by raising the ISO a couple of stops and increasing the aperture to f11.
The problem is the moon moves! Every two minutes it changes position by its own diameter, so basically, any shutter speed slower than one second will show blur.
As the moon rises the dynamic range increases and an exposure long enough to retain detail in the landscape results in the moon becoming a white disc, as in the photo below. I don't mind that much as the point of the photo was to photograph by moonlight rather than photograph the moon.
According to Brenda Tharp in her excellent book extraordinary Everyday Photography, the best time to shoot the rising moon is the night before a full moon and not on the day of the full moon itself. The reason is that on the day before there is a period of about twenty minutes when the balance of light is such that it is possible to capture detail both in the moon and in the landscape.
I discovered the truth of this by happy accident one week three years ago when I went to my favourite north coast location - Ballintoy - to photograph sunset.
It was a gorgeous evening. When I thought photography was over for the day, I packed up, and was driving back up the twisty road from the harbour when my peripheral vision caught sight of something that brought me screeching (almost) to a halt.
It was an amazing reddish orange moon. I quickly unpacked, set up my tripod and grabbed a few shots before the moon rose too far and the twilight disappeared.
When I showed the shots back home a question immediately arose: is that really the colour of the moon? How could I prove that I hadn't been messing around with Photoshop to produce impossible colours? Science came to the rescue.
When we look at the moon we are seeing it through the earth's atmosphere. When it is low over the horizon the angle of view means we are seeing its light go through the most atmosphere which in turn means that while the light at the blue end of the spectrum is scattered the light at the red end is not.
So the closer the moon is to the horizon the redder it seems to us.
As it rises in the sky there is less atmosphere for the light to travel through so red turns to yellow and then towards white. A similar thing happens to the sun.
Capturing the moon like this generally requires a combination of good planning and good weather. Planning is possible thanks to a variety of apps that will indicate the times of moonrise and moonset and what kind of moon it will be.
In addition, an app like The Photographer's Ephemeris will indicate the angle of the moon (and the sun) at whatever point we choose.
This helps avoid turning up at a location hoping to photograph moonrise only to discover that it is hidden behind a headland or group of hills. It also helps in trying to select a location where there is an interesting foreground to add interest.
I was again fortunate to be at a point on the coast where I was able to include some landmarks although had I been prepared I would have tried to choose an even more interesting location, such as an old ruin.
Another advantage of shooting the moon close to the horizon is that it will appear larger. This is simply an optical illusion known as 'moon illusion' and the reason for it is still debated.
Getting the right settings in camera for this kind of shot was also a challenge.
As often it is a trade-off between trying to keep the ISO reasonable to avoid noise, having an aperture that allows for acceptable sharpness for the foreground while maintaining the moon in focus and a shutter speed that minimises blur.
For the above shot, I chose 50 at f16 which meant a shutter speed of 3 seconds. If I was doing it again I would try for a faster shutter speed by raising the ISO a couple of stops and increasing the aperture to f11.
The problem is the moon moves! Every two minutes it changes position by its own diameter, so basically, any shutter speed slower than one second will show blur.
As the moon rises the dynamic range increases and an exposure long enough to retain detail in the landscape results in the moon becoming a white disc, as in the photo below. I don't mind that much as the point of the photo was to photograph by moonlight rather than photograph the moon.
Sometimes if there is cloud around it is possible to retain a little detail in the moon as in the shot below, taken in an apple orchard in Co Armagh, with the Mourne mountains on the horizon.
Where the focus is particularly on the moon itself, then objects will only appear in silhouette.
I took the photo below on the hill called the Collin, just outside Ballyclareusing the wind turbines as silhouettes. Here the yellow is still very apparent. It was a hand held shot so I needed to use a high shutter speed.
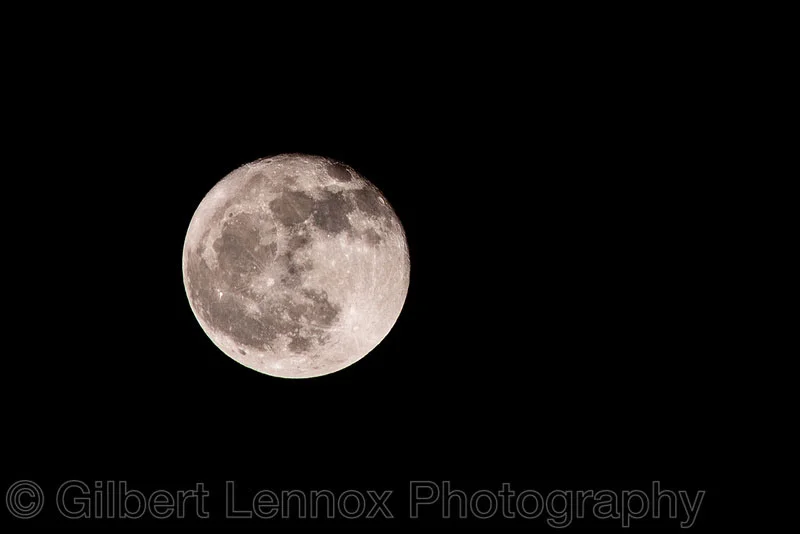
Still thinking about the colour of the moon, when seen in close up on a very sharp and clear winter's night it looks rather grey. Apparently, the grey colour comes from the makeup of the moon's surface: mostly calcium, iron, silicon, oxygen, magnesium and aluminium.
To shoot the moon in close-up like this I used a 70-200 zoom plus a 1.7 teleconverter. I also cropped in post-processing.
Where the focus is particularly on the moon itself, then objects will only appear in silhouette.
I took the photo below on the hill called the Collin, just outside Ballyclareusing the wind turbines as silhouettes. Here the yellow is still very apparent. It was a hand held shot so I needed to use a high shutter speed.
Still thinking about the colour of the moon, when seen in close up on a very sharp and clear winter's night it looks rather grey. Apparently, the grey colour comes from the makeup of the moon's surface: mostly calcium, iron, silicon, oxygen, magnesium and aluminium.
To shoot the moon in close-up like this I used a 70-200 zoom plus a 1.7 teleconverter. I also cropped in post-processing.
A 300mm lens would have been even better.
The basic setting for this shot was ISO 200, at f8 or f11 with a shutter speed of 250. You can increase aperture to allow for faster shutter speed if hand-holding the camera wouldproduce blur, otherwise, use a tripod.
A couple of other tips I have picked up from others and have found useful.
Try to get out into the countryside so that there is less light pollution.
The higher above sea level you are the better - unless you want to shoot the moon low to the horizon over the sea. And make sure you can see your way home or back to the car.
You may start out in beautiful evening sunshine but find yourself plunged into darkness. Carry a torch and wrap up warm.
A flask of warm tea or coffee is also very helpful, as is a fully charged mobile phone.

In Praise Of Eccentricity
It would seem that we need our eccentrics.

“One of the most popular sites on the North Coast is a monument to eccentricity.”
Mussenden Temple. It was built by the famous Earl-Bishop, Frederick Hervey, 4th Earl of Bristol and Bishop of Derry - an agnostic (handy for a Bishop!) art lover, cultured, licentious, hard-working, philanthropic and according to Donald Akenson, "the most worldly, most eccentric, most talked-about priest in the Church of Ireland".

The Earl-Bishop put the Giant's Causeway on the map scientifically (he was a vulcanologist) and as a tourist destination, becoming a fellow of the Royal Society because of his work there.
He built roads, invested in agriculture and worked in the cause of religious freedom. He also found a clever way of making church land his own and there built a summer residence on it, sadly now in ruins, adding to it year on year, filling it with art treasures from all over Europe.
And he built Mussenden.

According to Stephen Rice in his book The Earl Bishop, through his many stays in Rome Frederick Augustus fell in love with the temple of Vesta, virgin goddess of the hearth.
He wanted to buy the temple and bring it back to Ireland but the pope refused his offer. So he had his own architect sketch the temple and then built his own version on the edge of the cliff at Downhill, which he used as his personal library.
To the magnificent view from its windows he added his own considerable decoration - once again sadly lost.
He eventually abandoned Ireland, perhaps worn down by the task he had set himself of seeking to ensure religious tolerance and liberty and lived out his final ten years in Italy.
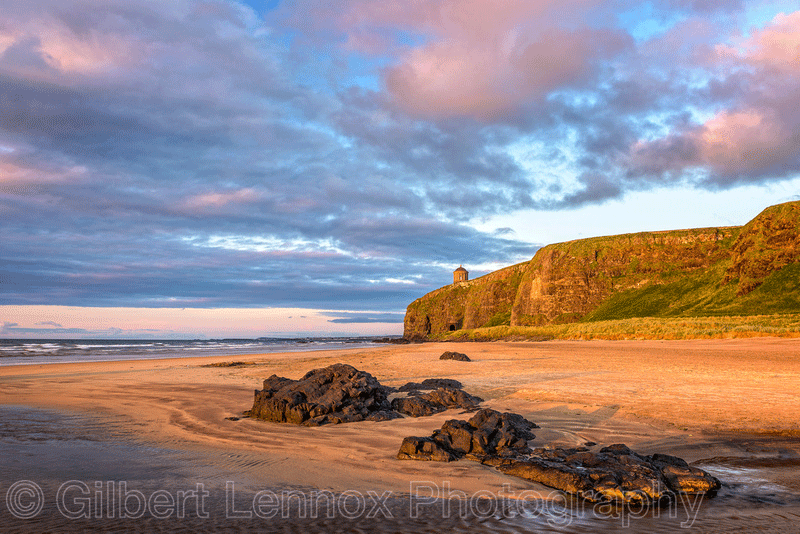
“He left us one of the finest sights in the country.”
On a clear day the view across the coast from the steeply inclined Bishop's Road is breathtaking as the opening image reveals.
Mussenden can also be viewed from the strand beneath and is an imposing sight in the setting sun.

From the National Trust car park it is a short walk to the ruins of the great house...
...and to the prize: the temple itself.
On the evening in question I had literally to race, camera swinging, sweat pouring, to catch the sun before it settled behind Donegal. (I also had to negotiate a group of slightly intoxicated young people offering to pose.)
“I suspect there is a little of the eccentric in us all.”